|
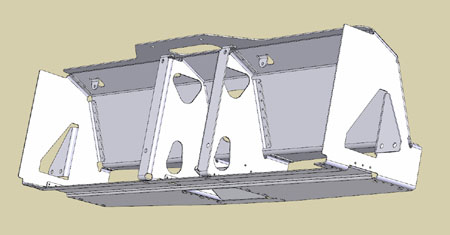
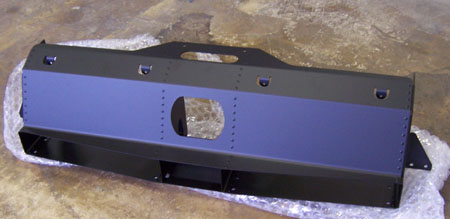
04/01/06 It's been a while since anything happened on the car but things are finally moving forward again. I was trying to explain to someone why I haven't been working on it much lately and it hit me - there are so many things that will have to change for production and I already have them redesigned in my head that right now I'm basically putting a lot of effort and money into a prototype that is essentially obsolete. True, I must finish it and test it because it holds the answers to many key questions that will determine the final design of the production version. And I will. It's just hard sometimes. Nevertheless I've finally finished the design of the nosepiece, got it quoted and placed an order for a pair of them. There are two reasons for that. One is that it's a crush structure in case of a frontal impact and should I be unfortunate enough to test that function of it I'll need a replacement. Also, because of how the pricing works on this type of project, it's only a few hundred bucks to get a second one so might as well. The PO has already been placed but I still need to get the full set of production drawings to the vendor on Monday. Of course while working on that I ended up tweaking the design some more but it's good to get the final changes in before the parts are made. This is what it looks like:
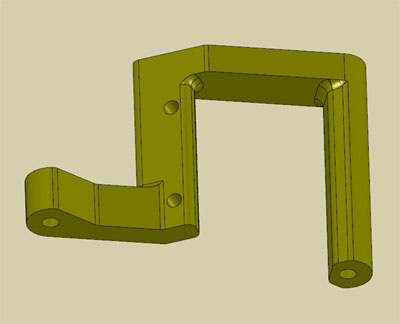
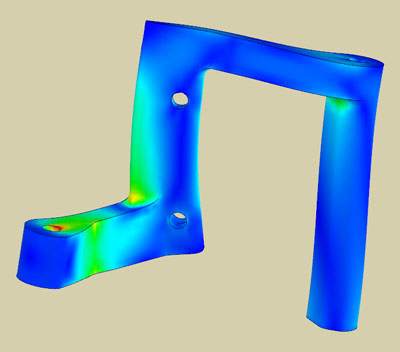
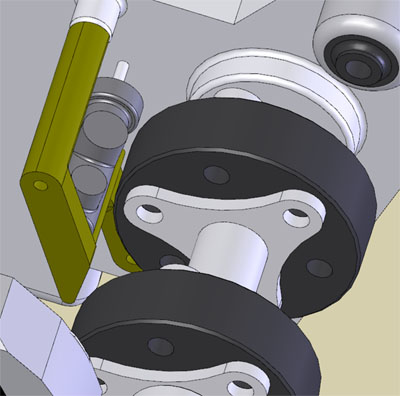
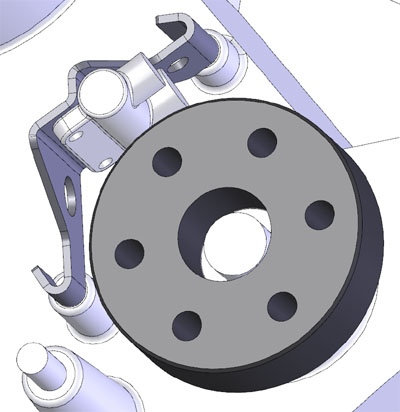
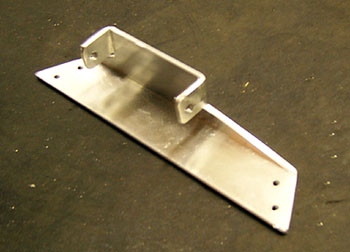
A lot of the details of how things go together had to come from just staring at the CAD model for a few hours, spinning it this way and that, trying to think of such little things like access for installing the radiators and their associated plumbing, attaching the front diffuser and the undertray, supporting the bodywork, etc. Lots of fiddly issues. Hopefully I haven't missed anything major. If I did - well, it's a prototype, right? :) Anyways, things are once again moving. It'll be four weeks before I get the parts back so that gives me time to get a lot of other things taken care of. No shortage of those. 04/11/06 Finally got around to designing the clutch slave cylinder bracket. I've been kind of dreading this because of all the odd angles and tight dimensions. I started by measuring the OEM sprocket cover which also serves as the slave cylinder mount. Then I made a model of the new slave cylinder, then added the pertinent clutch mounting points and features to the engine model (hopefully I got everything right). From there, it took a couple of iterations to come up with an acceptable bracket design. It has to position the slave cylinder, provide access to the bleed screw and clutch hose, clear the drive donuts and not interfere with shift mechanism which will eventually need to be moved (I forgot that the Hayabusa reverses the direction of the pedal motion so right now upshifts are forward on the lever and downshifts are back, like in Audis, which I don't like). Once the design was nailed down I ran a quick force simulation with a 200 lb load and tweaked a couple dimensions to strengthen/stiffen it a bit. It's definitely a whole lot stronger than the thin cast OEM part so hopefully it'll work well if/when I install heavier clutch springs.
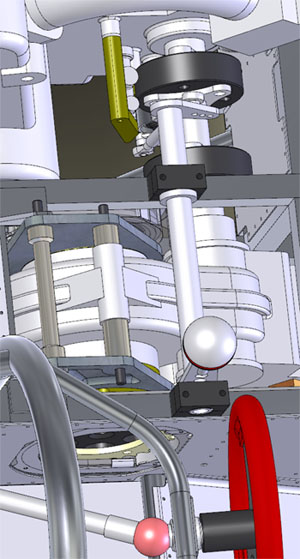
The bracket ends up weighing only 0.33 lbs and is good for well over 200 lbs clutch force, deflecting only 0.002" at 200 lbs. This ought to do it. Now I need to get it quoted and made. Hopefully it won't be prohibitively expensive. Depending on price I might make a couple more in case anyone else wants one. 04/12/06 Now that I know what the slave cylinder bracket looks like, I moved the shift lever forward in the model and flipped the side on which it activates so that the shift pattern is 'correct'.
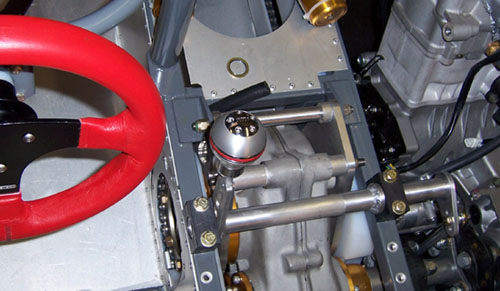
Yep, everything clears. Now I just have to install four new rivnuts in the frame and move the actual part. Maybe this weekend. By positioning the lever more upright the knob remains aligned in plane with the steering wheel, despite moving the base 2" forward. Actually, it ends up working better this way overall. Sometimes things just work out. 04/15/06 Moved the shifter. After playing with the location a bit I decided to move it another 1" farther forward than I had in CAD. Overall, a pretty straightforward procedure that took about an hour at a leisurely pace.
Works pretty well and the shift pattern is now 'correct'. If only everything on the car was this easy :) 04/28/06 Well, some things are definitely not easy. You'd think a simple bracket machined from a 5" square piece of 3/4" aluminum plate would be a piece of cake, right? Nope. The shape of it and the inside radii make it a really tough piece to machine so I got quotes ranging from $245 to $500 for a single bracket ($80 to $175 apiece in qty 5) - and that's not even anodized. Time for Rev B. I've had pretty good luck with precision sheetmetal so that's the approach I'm trying next - just a simple bent piece of 1/8" steel. Took a while to visualize what shape it would take but once I saw it in my head everything became very clear and it only took 30 minutes to model and document.
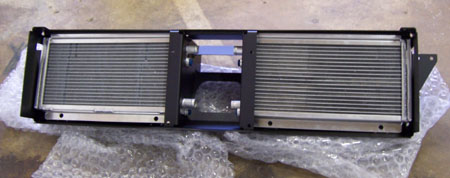
It ends up weighing the same as the aluminum part and is 4x stronger according to SolidWorks. We'll see what the cost might be on this one. Flex shouldn't be an issue either, analysis showed less than 0.003" deflection at 200 lbs. I'll just need to use large washers under bolt heads to properly spread the loads. Since the clutch pushrod is located directly between the two mounting bolts all the twisting moments cancel out and it's just a straight pull on the bolts. 05/17/06 Wow, time sure does slither right along. Finally got the two nose structures. They look exactly like they're supposed to - CAD is wonderful that way.
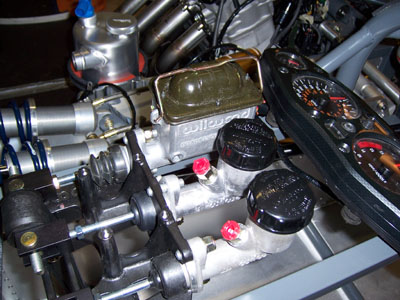
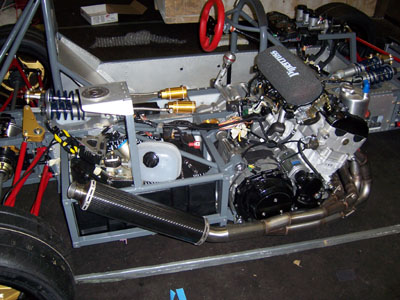
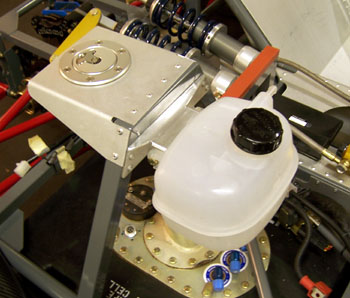
The radiators fit right in, too. I'll need to do some minor tweaking (didn't account for thickness of welds in a couple of spots) but generally I can make some progress now. Plumbing, electricals and linkages are all that remain before the chassis can be driven. Electrical should be easy, I'm just using a stock harness from the bike. Linkages are continuing to be a hassle. I've been trying to buy an Elise gas pedal from Lotus for 3 months now. The best they've done is deliver half of it. They don't even have a part number for the whole thing it seems, or that's what the dealer is telling me. I know people who have gotten those just to keep on the desk, so why is it so hard? Also, the clutch slave cylinder saga goes on. The sheetmetal pieces are cheaper but the setup fee still drives the cost up and I don't think I can sell any so making more than one is a waste. So now instead of doing a bracket for an existing cylinder (which I'd still have to modify) I'm pursuing the route of getting a custom cylinder made that doesn't need a bracket and uses the internals from the one I bought. Simpler and probably cheaper too. Just have to follow up on it. I just need to make a list of things to do and do them.... Endeavour to persevere. Sigh. 05/27/06 I've actually been working on the car a bit at a time lately but haven't gotten around to doing an update. Since today I did more than normal I figured this would be a good time to catch up. First, the nose is more or less mounted now (still needs some minor tweaks and bracing but it's almost there). The new master cylinders came in. They are smaller than the old ones and clear the bodywork better. Shown below are two new ones and one old. Also I had to change to a 5/8" clutch master, hopefully that's small enough to give me at least some clutch pedal travel with a 16mm slave. Calcs show the travel should be about 2" which is not a lot but hopefully it'll work. Also started fitting the wiring harness, attaching a few brackets and such. Thankfully the stock Hayabusa harness should work well and reach everywhere that it needs to so I'll only have to splice a few individual wires rather than the whole mess of them. The car looks more and more 'real' every day.
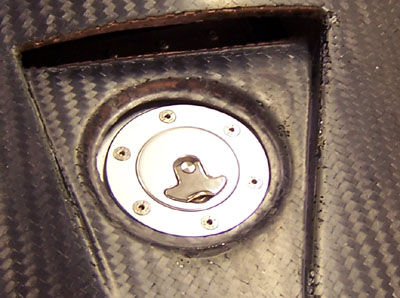
After messing with the harness and brackets for a bit I decided to finally mount the gas cap. For that I first had to trim the bodywork to slide over the nose piece and do a rough trim for the gas cap opening. After that was done, the cap bracket was aligned and installed.
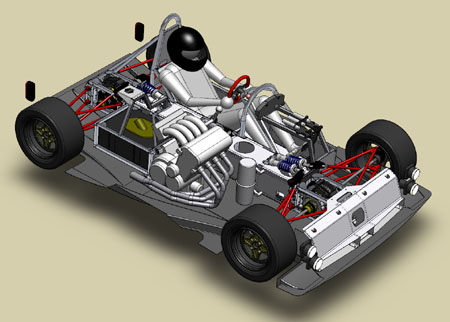
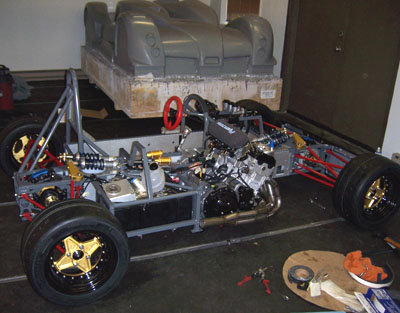
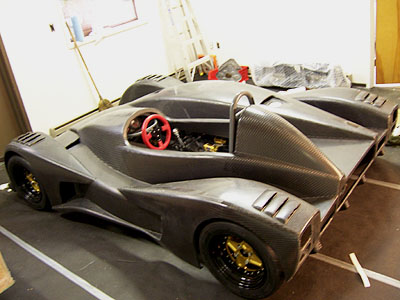
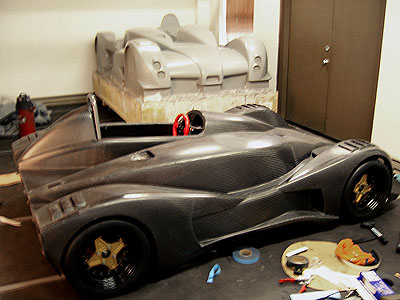
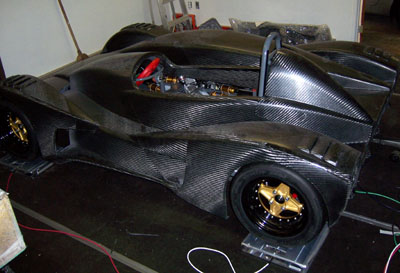
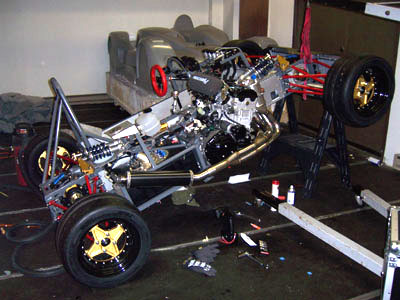
Now that the body can be properly supported in at least some of the places that it needs to be, I did a test fit (and some more trimming). Looks reasonable. This is the most complete that the car has ever been yet and is the first time the body is not supported by blocks of wood but is actually on the car. Still a ways to go but I'd say some progress has been made. Especially if you recall the pile of parts on my spare bedroom floor some three years ago...
And then look at what it is today.
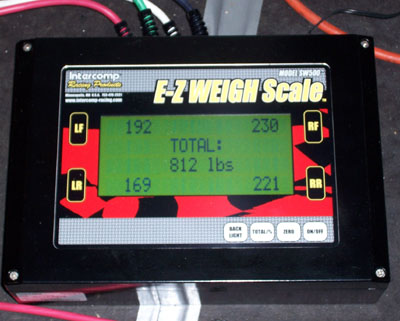
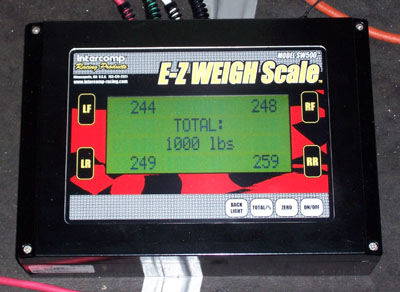
It's getting there. Slowly but surely. In related news, a prototype of the Hayabusa-based V8 that will power the production version of the dp1 is being tested in a Lotus 7. Scary fast, apparently. As a 1200 lb car with 375 hp should be (until you make it 400 lbs lighter and add AWD). Here is a small video clip that was taken a couple months ago showing the sound of the thing. I've been promised a better one shortly. 06/01/06 Got a couple items today. One was a set of corner scales. CAD and spreadsheets are all well and good but reality has a way of having its way with such things. So this is a milestone of sorts, in that I finally get to see how closely theory and practice correlate on weight. I first weighed the car empty and then sat in it to see how the weight distribution changes. The suspension setup was totally eyeballed. I made no effort to adjust it or even measure anything. Just bolted it together basically.
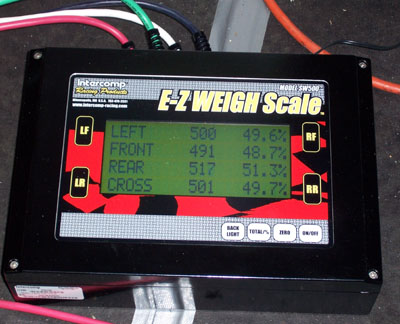
OK, so it's overweight relative to my design targets. Especially considering that there's about 75 lbs worth of stuff still missing from the car (floor, fluids, some brackets and paint). With me in the car it is 1,000 lb exactly (my shoes are heavy, yeah, that's it) and will be closer to 1075 with me onboard when finished. Rerunning the weight calcs on the most up-to-date SolidWorks model with driver weight set at 185 lbs the total comes out to 1,044 lbs (with floor and 6 gallons of gas). Not bad for accuracy but shows that the weight problem is in the design and not something unexpected. So when all is said and done the prototype will only be around 150 lbs lighter than the Westie was, rather than the target of 300 lbs reduction. It's actually not too disappointing since this is only a prototype and it gives me a base to work from. I know that the center diff is a big offender weight-wise and it will go away in production. The 23 lbs worth of chain will get replaced with 3 lbs worth of belts. Chassis will go from steel to carbon. Wheels will most likely be carbon as well. So the 800 lb goal for the V8 is not unattainable, but it will take a bit of doing. Good to have a challenge and I now have confidence that when I solve it in SoildWorks the reality should correspond pretty closely. In the meantime, the good news is how close the balance came out, even without touching the setup. I know I can get the crossweights dead-on (they already are, for all intents and purposes) and the other percentages are pretty damned close. Overall I feel pretty good about it. And now that I have the scale, we'll see what the various vehicles really come in at. I'm especially curiuos about my old Elise 190 which is sitting in the next room. The other item I got is a muffler. I just bought a brand-new carbon muffler for a Ducati Monster off ebay for $100. I'll probably end up using something different in the long run, even on this prototype, but in the meantime it will do for the purpose of getting it running and driveable. Soon.
06/13/06 Did a bit more work on the car. After all the CAD/CNC stuff, I decided to make a couple brackets manually. Just to make sure I still know how. We're talking hacksaw, file and hammer kind of work. So I made a bracket to hang the coolant overflow tank (an Elise item, purchased from eliseparts.com in England for $35 or so, delivered - about half the price of any other tank I could find). Turned out OK although I probably should have painted it... Eh, it'll be fine.
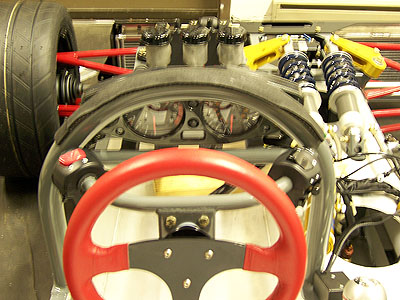
Next I made some very simple pieces to mount the dash (I suspect it will vibrate in use so I may have to add some supports later). Then I figured out how to use the Hayabusa switchgear. Turned out pretty cool - the turn signals, high/low beams and horn are perfectly positioned for right hand and kill switch/start button are within easy reach of the left. Works for me. This was actually the original intent, which is why I kept the items off the bike, but I had forgotten about it over the years.
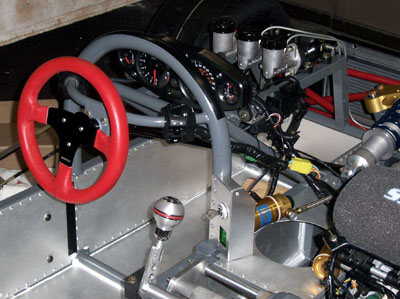
I also sat down and finally made a list of all the fittings and their various sizes that I need for the plumbing - fuel, coolant, oil, clutch, brakes. I still need to finalize some of the details and then I can order the parts - hopefully soon. I've officially given up on getting an Elise gas pedal and I think I'll just have one machined from aluminum plate. So now I need to design that, too. And get the throttle cable made. The clutch slave is supposedly on the way so hopefully I designed it correctly and everything will work. We'll see. For fuel I was going to use a stock regulated fuel pump inside a header tank fed by a low-pressure pump in the cell. Now I think I'm just going to go to a high-pressure in-cell pump and an external fuel pressure regulator, like the Westie had. Turns out cheaper and simpler. Of course now I have to buy those items too and then take the cell apart. Always more to do. At least there's progress. 06/16/06 Work continues. Fabricated a little aluminum panel to house the ignition switch and the Geartronics gear indicator. Came out reasonably well. Figuring out the sight lines took a bit but I think I've got the gear display where it will be visible and not obstructed by hands and knees. Again, I probably should have painted the panel black but because it's so far inside the car the reflections should not be an issue. It also has some space for a couple extra switches and/or lights if I decide I need them. The actual wiring for the ignition switch I did last night after more than a couple drinks. Just seemed like the thing to do at the time. Hopefully it'll work :) While installing the panel and the associated items I also cleaned up much of the wiring harness around the cockpit. Got started on the brake lines too (waiting on some parts before I can finish the brake install).
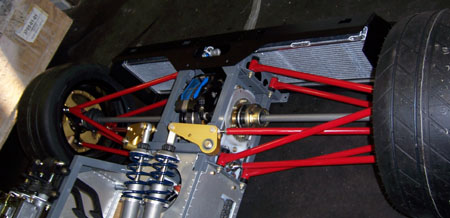
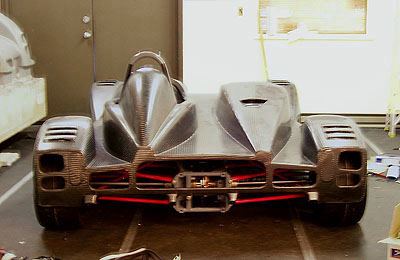
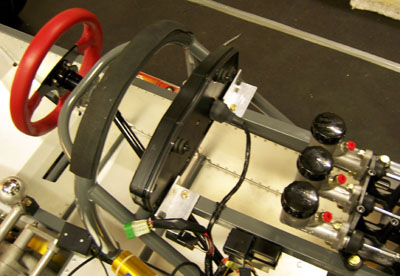
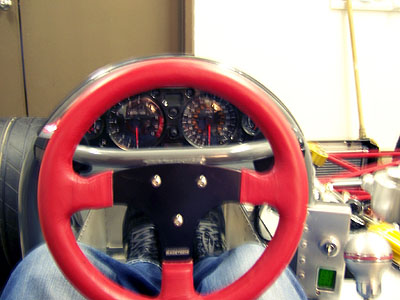
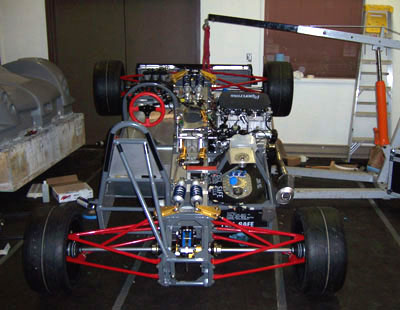
The cockpit is actually a pretty comfy place to be and with the removable steering wheel getting in and out is not a problem - even with the body in place which was a bit of a concern earlier. This systems stuff just has to be chipped away at, one item at a time. Also, while staring at the car and thinking about how I'm going to route some of the brake lines underneath, I think I have come up with a way to install the floor without cutting it into sections. I'll try it when the brake parts show up. It'll be interesting :) 06/21/06 Received the brake lines and fittings so decided to try and finish the brake plumbing. To get to the underside of the car, the easiest was just to pick up the front with an engine hoist. The sawhorse is there mostly for safety, as a backup.
When the time comes to mount the floor I'll use the same procedure, hopefully it'll work. First, I finished running the hardline to the front and to the rear. The last short section both front and rear needs to be flex line because calipers move with the diffs when chain is adjusted. The hardline running to the rear turned out to be perfect length. Actually, so did the front. I wish I could say I planned it this way but I just totally eyeballed it and got lucky. At least some things work out.
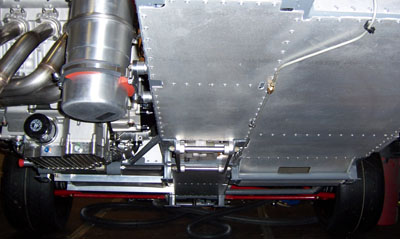
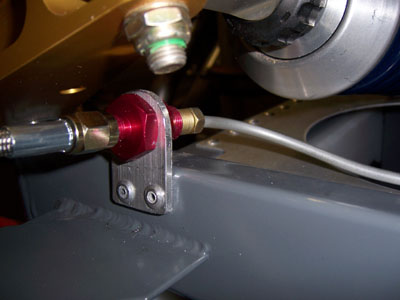
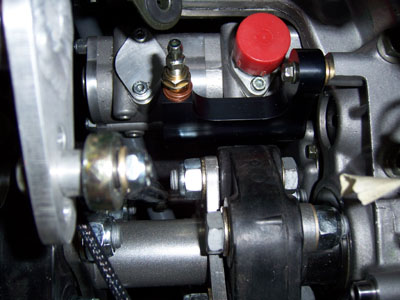
Had to fabricate the little brackets which was pretty easy. Except I had to do them twice due to having placed the rivets too close to the brake line initially. The line itself is the standard automotive stuff from the local auto parts store. Cheap and should to the trick. The flex lines have a problem, however. I need to make a right angle connection to the calipers and I had assumed that a banjo fitting would work - the thread is correct. Nope, the bolts I just got only go in half as deep as they need to. Damn. Time to order different lines (at least they're relatively cheap). Assuming I can find the right fittings, that is. And finally, the clutch saga just goes on and on. I got the new custom slave cylinder. It does fit in place pretty well, although clearances are tight but I knew that.
The vendor didn't tap the hole (on review it seems I did not supply a fab drawing and the thread did not come through in the IGES - my fault) so I had to buy a tap and do it - not a big deal. Only took a couple minutes. The problem arose when I went to take apart the Ducati cylinder the internals from which I was going to use. The nasty surprise was that the cylinder is actually a much smaller bore internally than it looks, the setup is kind of a cylinder-within-a-cylinder. Damn. In part, it's good that I didn't just do a bracket and use the Ducati part because the ratios would have been horribly wrong. The bad part is that now I need to either find a 14mm piston and seals somewhere or get more custom stuff made. Argh. But again, my own fault for not taking the cylinder apart sooner and just assuming that the outside bore is the working one. Well, if it were easy then everyone would be doing it, right? :) So now I need to find and order proper brake flex lines, figure out the clutch slave (again) and do a whole lot of other plumbing and miscellanea. Oh, and a gas pedal, throttle cable, etc. I wonder if this thing is going to run this summer? Sigh... At least there's progress. It seems a year ago, when the car first sat on its wheels, the end was well in sight. Apparently not. As another item, with the front wheels in the air I noticed there is definitely play in both bearings. So I guess I need to try and tighten them more? I seem to recall that some FWD bearings (which these are) need something like 250 lb-ft torque on the flange nut. I have about 100 lb-ft right now. When the car comes back down on its four wheels I'll try more torque and see if that works. |