|
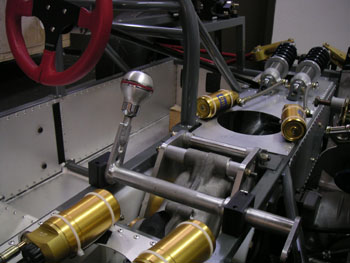
11/01/05 (updated 11/03/05) Picked up the shifter parts and the steering rack brace... I'm waiting for some fasteners to come in before I can finalize the shifter install. The rack brace went in just fine (SolidWorks comes through once again!) - although it is a really confined space so it's hard to get a picture of it installed. Need to grab a couple of bolts from the hardware store to capture the ends but even without them the steering is much more solid.
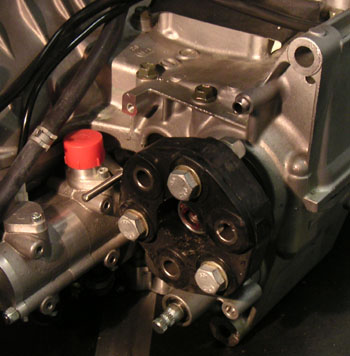
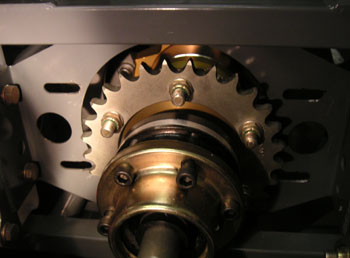
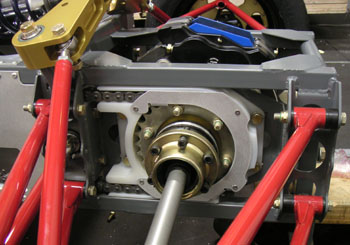
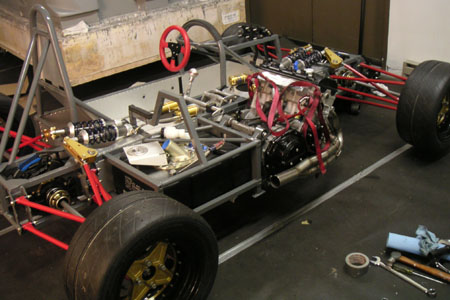
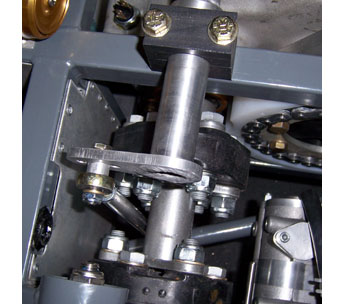
Couple days later went back and installed the end bolts in the steering brace - works great. The rack is perfectly solid now (also took some better pics). Whew. Next up is the driveline. I pulled the motor, installed snaprings on the center diff drive flanges and put some oil in the diff. I still need to figure out a better filling/venting scheme but I think I know how I'm going to do that. With the diff as far along as I can get it until I get more parts, the drive couplers got installed next.
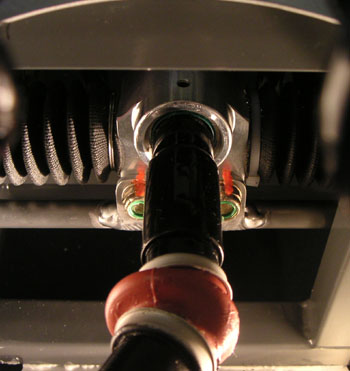
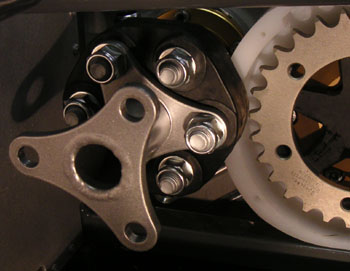
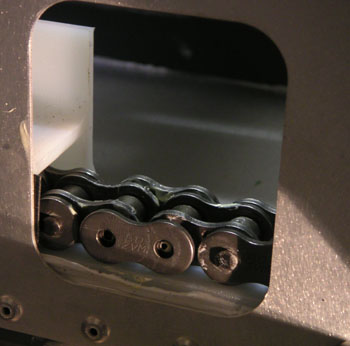
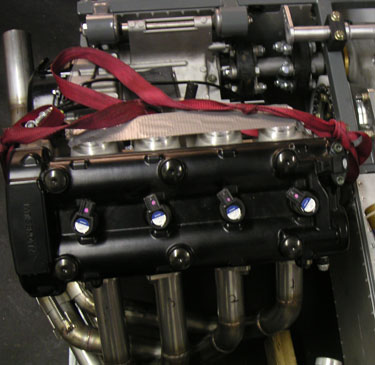
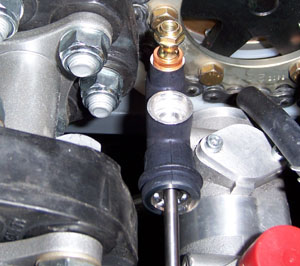
The clearances are pretty tight but everything fits. The only challenge is going to be during engine installation because the bolts are too long to install last, they have to be pre-placed and that means I'll need about 3/8" lateral motion on the engine in the mounts, which the current setup won't allow. So I'm going to have to figure this one out. I think I know how but it's a work in progress. One thing I need to tackle is the clutch slave cylinder mount design. As seen in the last picture above, the clutch actuating rod comes out right next to the drive coupler. Obviously the slave cylinder can't go there so the rod will need to be lengthened and the cylinder positioned carefully to fit between the drive couplers. It'll be an interesting challenge but as long as I measure everything correctly I ought to come up with something that works. Fun. 11/05/05 A day of challenges. Started out smoothly enough - installing the rear chain. The procedure is fairly straightforward. Feed it in from the back, install the master link using the service window and then rivet it with a chain tool.
The challenges started when I realized that the chain as-installed is already at the far end of its adjustment range. Chains normally stretch in the first hundred miles of use or so and I'd have no way of tightening it at that point. So I decided to try and take two links out. Sliding the diff all the way forward seemed to show that it would work. So I did - took out the master link and the one next to it. Attempting to reinstall the shortened chain was a long and painful process, though I eventually accomplished it with some dremeling of the mounting points. The problem is that now the chain is way too tight and the brake rotor hits the frame with the diff this far forward. Also, while messing with all this I cross-threaded some bolts in the diff carriers. Great. This just adds to the other setbacks I've been experiencing as of late. Not a good week - oh well, I'll live. So deciding to stop for a bit and assess the situation, I went home to ponder the lessons. Namely, to design more adjustment range than I think I'll need for the next round, but more importantly to stay away from fine threads. They are just trouble, even with inserts (I thought the inserts would eliminate any issues but that hasn't proven to be the case). Driving home I realised what I need to do - remake the diff carriers to allow 1/4" more adjustment outward and using all coarse threads. That would be the cleanest solution. Expensive, but hey - it's only money, and with what I've already got in this thing what's a little extra. I've spent more on less. So that's the task for early next week. Yay. The joys of R&D. 11/13/05 Got the CAD files on the V8 - looks like it will fit just fine.
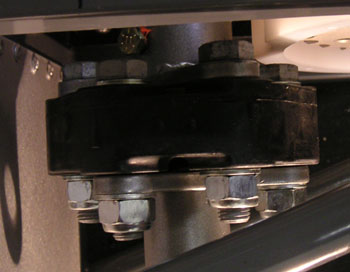
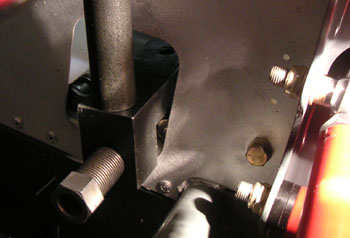
The exact mounting method and some of the details of course need to be worked out but I have a pretty clear idea of what needs to be done (I'll post it when I'm ready, so please don't e-mail with questions right now :). The fuel cell may need to change and/or move a bit to have sufficient clearance to the rear-facing exhaust header. But of course the whole chassis will be redesigned for production anyway. I'm starting to seriously think about only offering the V8 option. It will have a sequential gearbox designed to take the torque and with a real reverse gear. I have a hunch that in this price range people would prefer the way-overkill, full custom V8 over a motor from a $10K motorcycle. This project is all about pushing the envelope anyway :) 11/19/05 After looking at the quotes for redoing the diff carriers I realized it was time for Plan C - modifying the frame to allow the diffs to slide farther outward. Turned out to be a fairly straightforward task consisting of lengthening the slots in which the carrier bolts slide.
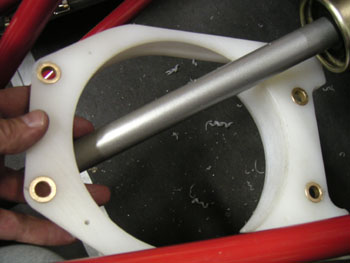
The other thing that became apparent is that the UHMW chain guides compress easily under bolt clamping force. I will need to tighten the bolts quite a bit, so I ended up installing brass bushings in the plastic parts to allow that. Again, fairly straightforward.
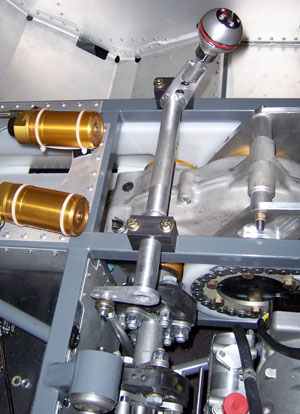
The front chain went on without issues and now appears to have plenty of adjustment available. This should do for the moment. I'll do the rear one tomorrow, probably. With the car up on jackstands it's easy to spin the wheels and watch the whole thing do its stuff. Pretty cool. Except this is going to be one noisy drivetrain! Oh well. Definitely belts for production. So much work remains...
11/30/05 Well, both chains are now on. After setting the car back down on its wheels and rolling it around, I discovered that the bearings are occasionally making weird grinding noises. Mostly it's the fronts doing this. I now recall having a similar issue with one of the rear bearings on the Westie - I think it went away after a while. The bearings are of course brand-new, standard FWD dual-row tapered stuff. There was no hint of any roughness from them when they were unloaded. The axle nuts are torqued to about 80lb-ft (I think the spec calls for something like 250 but I need to get a torque wrench that goes this high). So I'm wondering if this is 'normal' and will go away or should I be concerned? Hmmm... Next on the agenda - gas pedal, clutch slave cylinder mount, engine mount, radiator mounts, dry sump tank, fuel header tank, plumbing, muffler, bodywork mounts, headlight mounts, electrical... In other words, quite a bit. 12/29/05 (updated 12/30) It's been a month since the last dp1 update so I thought I'd post one. Things have been happening, albeit slower than I'd like (what else is new). The engine mount is now done and the engine is in. I ended up having to cut out a frame tube because it was interfering with a protrusion on the alternator cover. My failure here was that I did not model the protrusion. Solidworks is great for spotting interferences but only as long as you give it accurate enough info. Moral of the story - laziness upfront makes you work harder later. Live and learn.
Also received the dry sump tank. Now I have to design and make a bracket for it. Not a big deal as such but yet another task. Oh, and the rodends for shifter linkage are in. Ditto for that.
One of the reasons it's going slowly is that this is where I start running into things that don't work or don't fit. It's inevitable in a project like this, I knew this going in, was ready for it, but.... Maybe that is exactly why it's hard to move forward. The interfering frame tube is one example, here's another - the clutch slave cylinder. The stock one is simply too big to clear the driveshaft couplers.
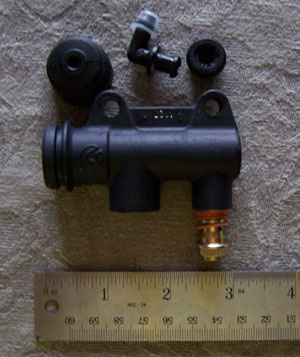
What I need is a very small diameter cylinder, 1" or less. In some ways that's good, it will make the clutch more suitable to foot operation (the stock part was designed for hand pressure, i.e. it's pretty big). The problem is that I doubt I'll find an existing slave cylinder that works. So the alternative is to make a custom one. Not as horrible as it sounds (these are pretty simple parts) as long as I can find off-the-shelf seals I can use. Perhaps a motorcycle master cylinder would be an appropriate parts donor? Again, in itself not the end of the world. But it is yet another thing on the list now. And so on. On the plus side (I think), with the car up on the jacks there is no roughness at all in the wheel bearings. So it seems the issues I'm experiencing are due to the wheels themselves shifting around on the hubs. I guess they're not hubcentric enough? But the conical lugnuts are tightened quite a bit. Hmm... Will have to ponder that one. At worst I'll need a new set of wheels but hopefully the solution can be less drastic than that. My new year's resolution? To quit whining and just do it :) I'll drink to that. UPDATE: Wow, quite a response to the slave cylinder dilemma - thanks, all! I'm going to take one of the suggestions and go with a motorcycle rear brake master cylinder. Should have figured it out myself, I've got three of them sitting in my livingroom! Sometimes it just takes a second set of eyes :) I can just plug the reservoir port and use a combination banjo bolt/bleedscrew to take care of the bleed function. Still need to design a bracket, of course, but it seems like the cleanest solution. I'll post the progress as it happens. 01/02/06 As the first item on the car for the new year, got the shifter linkage installed and adjusted. It even fits (not much room to spare but not much needed). And it works. Cool.
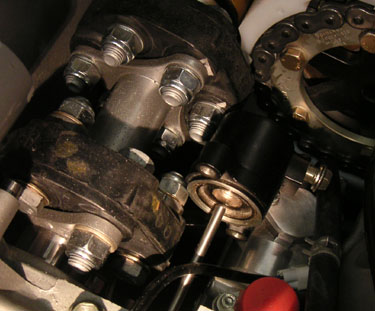
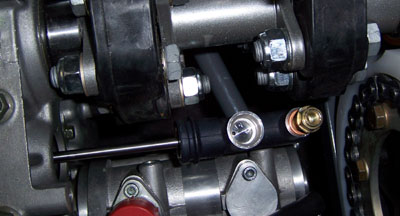
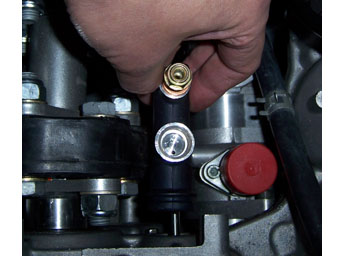
One task at a time, that's what's needed now. Have to decide what to tackle next. Probably the drysump tank bracket. 01/03/06 Went and got the master cylinder - the master that would be a slave. Seems to be about the right size...
The clearance is going to be tight but then this car is full of those. I do need to figure out a way to plug the reservoir port. That may prove tougher than it seems - we shall see. The pushrod will likely be shortened, to position the cylinder closer to the motor.
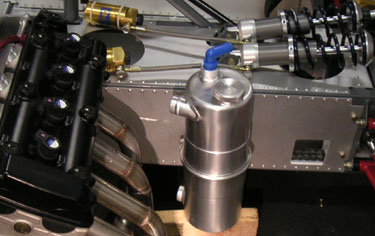
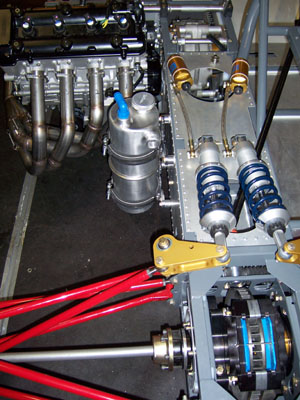
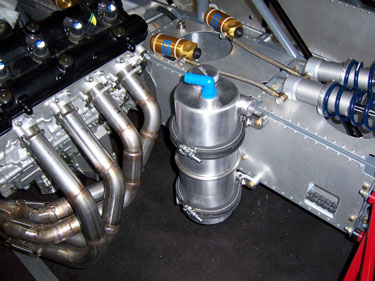
There is of course still the issue of the bracket, too. I am tempted to mount it to the drysump scavenge pump, but something tells me I should resist. It's not a component I want to be putting stress on. Well, as I always say, if it were easy everyone'd be doing it :) With regards to drysump tank brackets, I decided to just order a pair. Cheating, I know. Well, the tank is 5" diameter and brackets are for a 6" tank - is that better? At least a little bit of a challenge :) 01/10/05 Got the oil tank mounted. For now I used 1/2" thick foam rubber padding under the straps to account for the smaller tank diameter. The resulting mount is rather 'soft', which may or may not be a bad thing. Ultimately I think I'll look for harder rubber padding but for now this will do. Now I can move on to radiator mounts and then plumbing...
Got an update on the V8 development and that is looking very promising. Of course the price is going to be higher than anticipated but so it goes. The way the production version is evolving, I'm thinking it will be V8 only and considerably more expensive than first planned. Then again, I suspect that to the few people who buy them the price won't make much difference - as long as the car actually works as intended. We'll see. One step at a time. In other news, progress continues on alternate body design project. Cool.
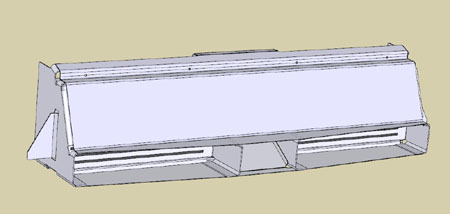
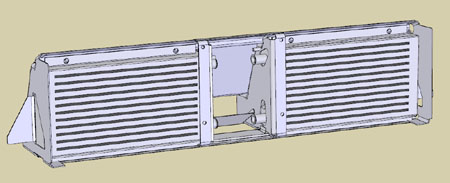
02/07/06 It's been almost a month since the last update... Worry not, things are happening in the background. A lot of it has to do with logistics and resource/relationship building to make production a much more realistic proposition. That's coming along nicely. I'm really excited about some of the developments but nothing is final yet so all will be revealed in due time. Probably late spring. On the design side I've been working on the front crush structure/air duct/radiator mount. Went through about five different versions but it's finally taking shape. It will be a sheet aluminum contraption, riveted together and bolted to the frame. It will support the front splitter and act as the front mount for the bodywork. And carry the radiators. And channel the air to both radiators and the front brake. A nice multi-function piece in true Chapman tradition, then :)
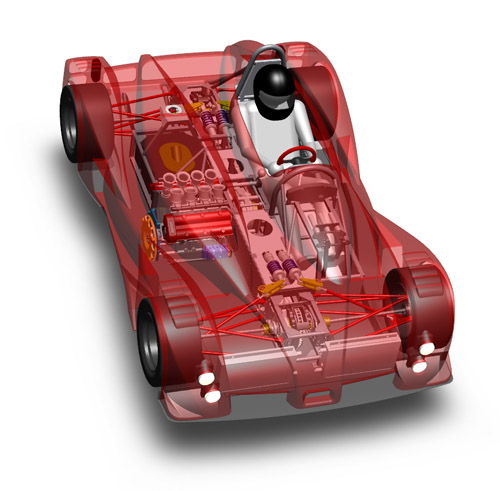
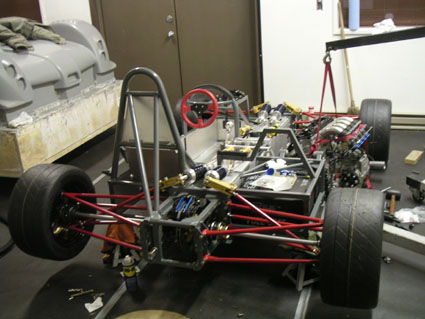
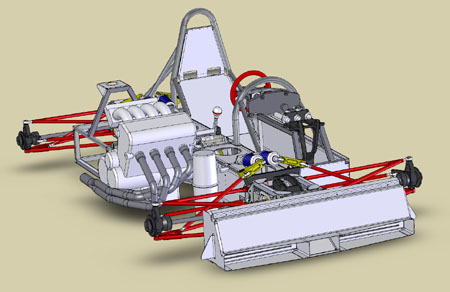
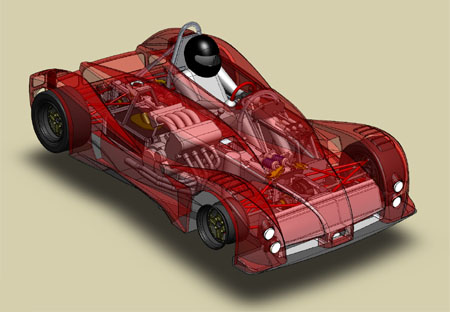
I probably need to spend some more time on the details - like making allowance for possibly adding a front a/r bar in that spot, making sure there's access to radiator hoses and sensors, figuring out the bodywork latchdown scheme, etc. I'm also wondering if I should mount it on rubber bushings to allow for some flexibility if the nose is bumped/scraped... Yep, needs more thought. Then it all has to be quoted, ordered and made. Probably another month at least before it's on the car. There are also a few other sheetmetal pieces (rear body mount/pivot, instrument cluster bracket, any throttle pedal bracketry, a couple other miscellaneous bits) which I would like to get into the same order. Always more to do... But it's getting done and that's the important part. Someone pointed out that I was going to have customer cars right about now... Well, yeah, obviously that's not going to happen this month. Summer? Hopefully. We'll see. Meanwhile, with all the recent updates, I figured it was time for another transparency picture. As the saying went in the tech biz - "We're shipping brochures in volume" ;)
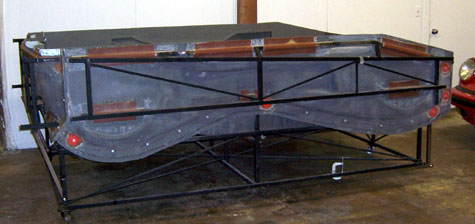
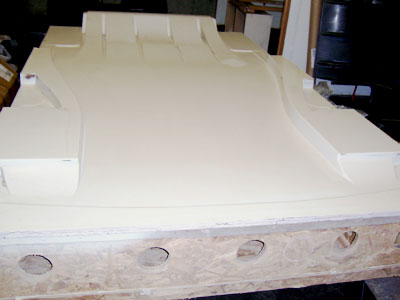
Here are links to larger versions at 1280x960 and 1024x768. 02/20/06 Not the most pleasant day. Last week I had gotten a call from Composites Unlimited asking me to pick up the molds that they've been storing for me. So I made arrangements to grab the trailer and borrow a truck counting on the last sunny day in the forecast to get it done. The challenges started when I went to pick up the trailer - couldn't find safety chains. OK, decided to go without. A couple miles into the drive to Scappoose, two cops are standing by the side of the road with laser guns. No problem, I'm not speeding. But as I drive by one looks at me, gets in his car and proceeds to pull me over. You guessed it, no safety chains. $250 ticket. Ugh. So I go on, stop by an auto parts store and buy the stupid chains. Arriving in Scappoose about 2 hours later than intended, they are not ready for me despite me having called earlier in the day to let them know when I'll be there. But the real downer is that I find that the molds have been sitting under an awning outside for months, contrary to earlier assurances that they would be stored in a container. Had I known this I would have picked them up months ago! There's water and ice inside both molds. This is particularly bad for the floor mold, which is made of MDF and is very moisture sensitive. It is cracked in several spots and water clearly got into the cracks. Looks repairable to use as a plug to make another mold but I'm afraid it cannot be used as a mold itself because a heat cycle would just blow it apart due to moisture inside. Great. CU did reassure me that if I run more parts they'll 'take care of it' but I'd rather they had taken more care to begin with. That whole MDF thing turned out to be a fiasco and you may recall it was done on suggestion from CU and over the objections of Janicki (the company that actually did the machining). Live and learn. Well, whatever, I get the body mold loaded on the trailer, tie it down and tell them I'll be back for the floor mold in two hours. At this point the sky is looking pretty grey and it's cold. Thankfully the trip goes without incident and the mold is easily unloaded at the shop.
I get the chunks of ice out of it, do a quick wipedown with a rag and head back to Scappoose. Showing up back at the CU facility exactly when I said I would I learn that most of their crew has already gone home for the day, including the guy who has the forklift keys. It is now snowing. Chris, the shop manager, does his best to help by driving over to another building a couple miles away and getting another set of keys while I try to wrap the floor mold in plastic the best I can. An hour later, the mold is strapped to the trailer and I'm on my way to face the peak of rush-hour traffic. Fortunately this being President's Day the traffic is not as bad as it could be and I make it to the shop without incident. Unloading the heavy mold takes an engine hoist but goes smoothly.
Now I have to ponder how to move forward. The floor mold will serve as a good base for working on internal body panels so I need to clean it up the best I can and make use of it. And I need to finish the sheetmetal and get it ordered. No point in getting depressed, this is all minor stuff - just need to keep making progress. Certainly no shortage of lessons in this project ;) |